Fields and Strategies
Strategies for playing on various type of fields and setups. While the fields you play on may not be setup exactly like these, many of the strategies will be similar.
Field 1

The Red Team:
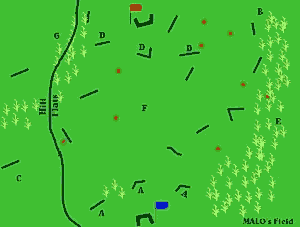
On this field if you are a member of the red team you have to act quickly. Leave three people to defend the flag at the D bunkers. They have to defend the flag and guard bridges 2,3, and 4. The rest of the team has to move quickly to get across bridge 1 in the forest which is well protected by the trees and the chance of getting hit is lower. Go through the forest until you reach the weeds at the south end of the forest. Hide there then use your position to crossfire at the blue team players that are in the F central area. Also keep your eyes open, the blue flag station can probably see you and will try to hit you from above. As soon as you have reached this area summon the rest of your team to meet you there and only leave one D bunker defender. Charge the hill together, and be prepared to take the flag. Usually when a big group charges the outnumbered players will be hesitant and will not try too hard. But don’t forget they have a better position on you.
The Blue Team:
The blue team has two choices and an advantage, they are located on a hill. Leave two people in the flag station. Their responsibility is to yell and notify the others of field activity and pick off aggressors. In order to win the blue team has to take bridge number 1. It is in a dense forest, which will give you plenty of cover. Stand behind trees and fight till you get the bridge. The rest is cake walk. Make sure you have a person hiding in the grass E to defend, they will probably never see him. You can maneuver and be virtually unnoticed.
Also the blue team can send people through the grass E to point B along the northern border. Once there they can rush bridge 4 and will have reinforcements from the other teammates in the F central area. Hopefully by then the F teammates could have at least killed some of the D bunker defenders. Then just get the flag and run back.
Field 2

The Red Team:
This scenario gives the red team many options. One I have seen work is to quickly run up the hill and set up defensive spots there. Obviously, the blue team will also try to make a run up there. Get your fastest men and get there and set up a defenders before point C or if you can get to point C get there. This is not a true hill but an elevated plateau. Just get up there. Make sure you have two or three people back in the D area to defend and possibly one in the red station for last minute surprises. Keep an eye on that huge weedy expanse E. watch for grass moving and heads poping out. Don’t fire at them, let them think no one sees them, then BANG get them when they are in range. Probably the boys on the hill can let ya know what is going on down there, and can probably eliminate a few. They can hide in the tall grass that covers the slope of the hill. Whatever you do, do not take the grass area first, it could be dangerous and full of surprises. Slowly work you way across the hill and field Flats until you get to the blue station.
The Blue Team:
If you are on the blue team quickly send two guys into the grass E to hide, leave two in the A bunkers or station to defend, send two into the flats to keep them busy, and send the rest up the hill. It is very important to get up the hill fast. Send your fastest and most experienced shooters up that way. They can hopefully out-maneuver and out play the others and take control of the hill in about 3-8 minutes. After that call down to the boys in the Flats and make a strong move. The key is STRONG move, no pansey wishy washy moves. Go means GO! Leave the E boys to wrap up the other side and any surprises from that side.
Another idea would be to send players to point B ad have them rush along the northern border. The D defenders would not see them until it is too late.
Field 3

The Red Team:
The red team has two options the hill or the grass. With limited players I would rather send most of the boys up the hill and one to the grass at point B moving along the east side behind the grass till point E. Use the grass as cover to pick off people hidden in the central F area, but that of course will give away your cover. The hill would be awesome. Charge up as soon as you can and take control. shoot down at people on the field to help other teammates out. You have some tall grass cover to help. The rest should move from bunker to bunker and help each other out. take out as many as you can then charge from both blind sides at once.
The Blue Team:
If you are the blue team leave one man up in the tower to defend, send one to the grass to keep that road closed, send the rest of your team (should be a majority) to the hill for some fierce battle. This battle can be won from the hill or the flats. Take bunkers and positions on the hill one by one and then rush the station.
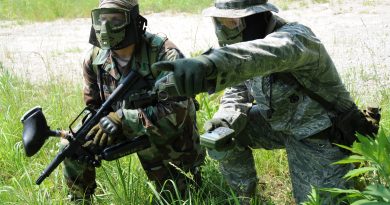
Hopefully these tips will help you become better paintball players!


